Frsky R9

Attention
ExpressLRS 4.x no longer supports STM32-based hardware. This includes the Happymodel PP, ES915 Tx and Rx, early NamimnoRC Flash and Voyager, FrSky R9, SIYI and ImmersionRC hardware.
The STM32 platform's limited compute resources and feature gaps (WiFi, Bluetooth, Backpacks) made for an inferior version of ExpressLRS that necessitated disproportionate maintenance burden for the Dev Team.
Bootloaders
The R9Mini/R9MM, R9MX and R9Slim+ require ExpressLRS Bootloaders to be flashed before the ExpressLRS firmware. The R9Slim doesn't have a bootloader and first time flash requires STLink.
Download the bootloader .frk file for your respective receiver. The files are as follows:
- R9mm/mini:
r9mm_elrs_bl.frk(14kB) orr9mm_no_btn_elrs_bl.frk(14kB) (no_btn bootloader is only used if your bind/boot button on the receiver is faulty or has gone bad.) - R9MX:
r9mx_elrs_bl.frk(20kB) - R9Slim+ (ACCST):
r9slim_plus_elrs_bl.frk(14kB) - R9Slim+ (ACCESS/OTA):
r9slim_plus_ota_elrs_bl.frk(18kB)
Copy the relevant file to your handset's SD card (You can put it inside /FIRMWARE folder for easy access).
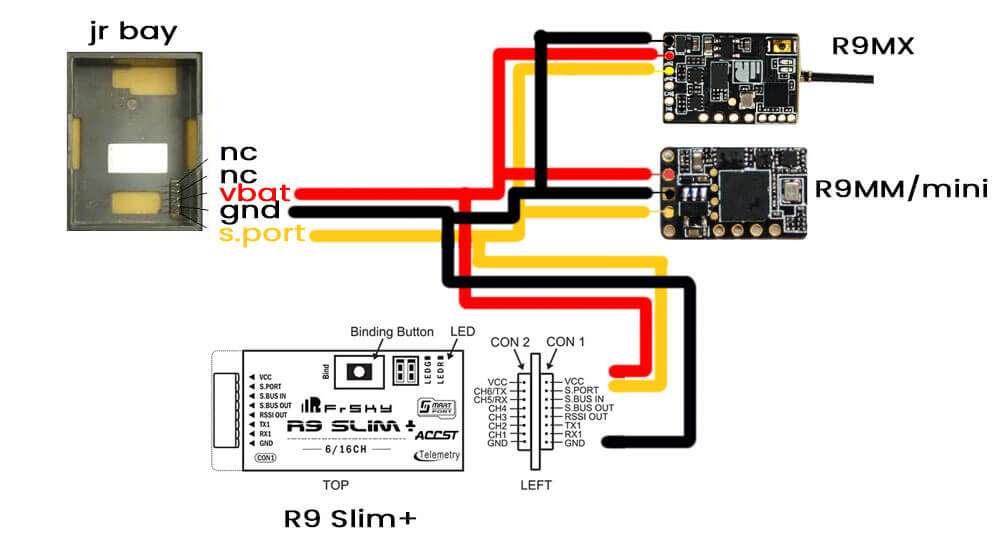
Wire the receiver to your radio's Smart Port, as shown:
Next, flash the .frk via the S.port flashing option in OpenTX or EdgeTX  (It helps if the External RF module is set to
 PPM mode.)
- Open the System Menu on the Radio
- For radio handsets with dedicated System Key, press the SYS Key.
- For radio handsets with a single Menu Key, long-press the Menu Key.
- Press the Page Key until you reach the
SD-HC Cardpage. - Select the
FIRMWAREfolder and press Enter. - Select the
.frkbootloader file then long-press the Enter Key. - Select Flash external module and press Enter
- Press Enter once the Writing is complete.
Once done, unplug the receiver and your bootloader is flashed.
FYI
You only need to flash the Bootloader ONCE. After it's flashed into the receiver, you don't have to reflash it in every update.
R9Slim doesn't have a bootloader. As such, you need to flash it first via STLink.
Troubleshooting No Sync
- Setting the External RF module to
PPMmode helps. - Check if the receiver has its LED lit up or if it's powered.
- Check whether you've set your
Max Baudsto115200, especially if you're using a QX7 or an X9D (on OneBit Firmware or EdgeTX). If so, put it back to400000and try again.
Wiring up your receiver
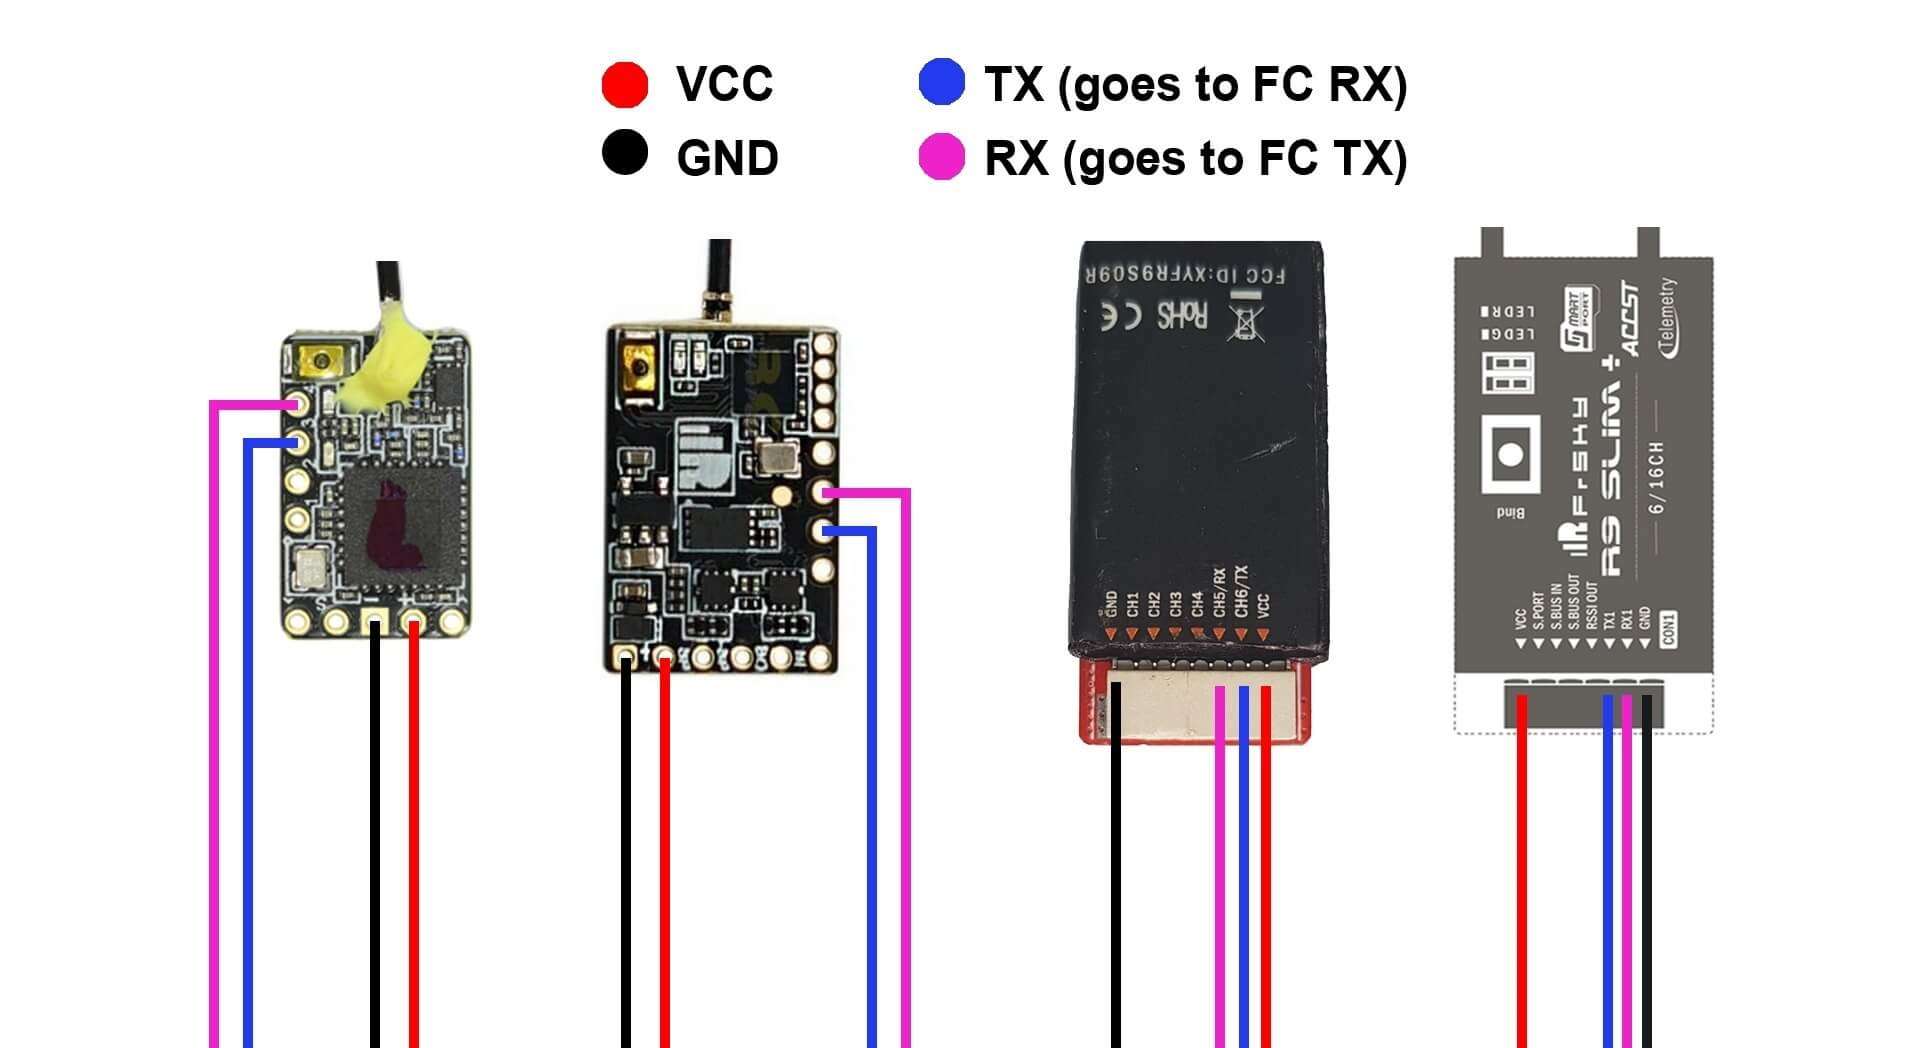
Note
This will be the same wiring you'll use for flying and the subsequent firmware updates (via Passthrough). Forget the factory wiring guide!
R9Slim need to be flashed via STLink first before you wire it up to your Flight Controller.
Configuring your Flight Controller
To configure your flight controller properly, please go through Configure FC page. These settings apply on INAV, Betaflight and other flight controller software.
Ports Tab should be setup so that Serial RX is on the UART where you have soldered the receiver.
Receiver protocol is CRSF with serialrx_inverted = off and serialrx_halfduplex = off.
The next steps will not be able to proceed properly and you'll have issues later if any of these are set differently. Once you have configured your Flight Controller software, close its Configurator and unplug-replug the USB cable from the FC or your computer to refresh the connection and you'll be ensured that the port is not busy.
Updating your Receiver Firmware

-
Make sure you have done your Receiver Wiring properly and that your Flight Controller is Configured. Also make sure bootloaders are already flashed to your R9 receiver when applicable.
Important Step!
This is an important step and guarantees updating success. If you haven't done these, GO BACK to those pages.
- Disconnect and close your FC Configurator app (Betaflight Configurator, INAV Configurator, etc).
- If your receiver powers up with just USB connected to your flight controller, unplug it. Press and Hold the boot button on the receiver (not the FC) and then plug in the USB. Release the button once the green and red LEDs blink alternately.
- If your receiver only powers up with a LiPo connected to your flight controller, unplug it. Then unplug-replug the USB cable to your flight controller. Do not replug LiPo yet.
-
Launch the ExpressLRS Configurator on your Computer.
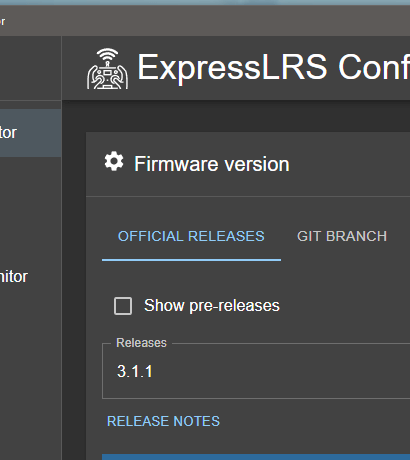
- Make sure
Official Releasesis active from the horizontal tab. - Ensure you select the Released version you want to flash into your Receiver.
- Make sure
-
Select the Device Category and Device target matching your hardware.
-
Device Category:
FrSky 900 MHz
-
Device:
FrSky R9MM/Mini 900MHz RXFrSky R9MX 900MHz RXFrSky R9 Slim 900MHz RX(If already flashed via STLink)FrSky R9 Slim Plus 900MHz RXFrSky R9 Slim Plus OTA 900MHz RX
-
-
Set the Flashing Method to
BetaflightPassthrough -
Set the firmware options for your device.
- Regulatory Domain (Mandatory. Choose the domain appropriate for the location or country you're flying).
- Binding Phrase (Optional, but Highly Recommended. Note this phrase as it should be the same on your other devices, or they will not bind or sync).
-
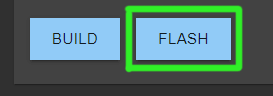
Click the Flash button.
-
Wait for the
Retry...lines to appear in the Build Log. Connect the LiPo to power up the Receiver if it only powers up with a LiPo connected.Retry...lines will not show up if your receiver is already in bootloader mode and gets powered up by USB.
-
Wait for the process to finish. A Green Success bar will show up in the ExpressLRS Configurator.
-
The LED on the Receiver should return to Slow Blinking LED pattern after a few seconds.


-
Disconnect the Receiver from your Flight Controller.
-
Wire up the Receiver into an STLink V2 dongle. Find the CLK, DIO, 3v3 and Gnd pads and wire them to the corresponding pins of the dongle.
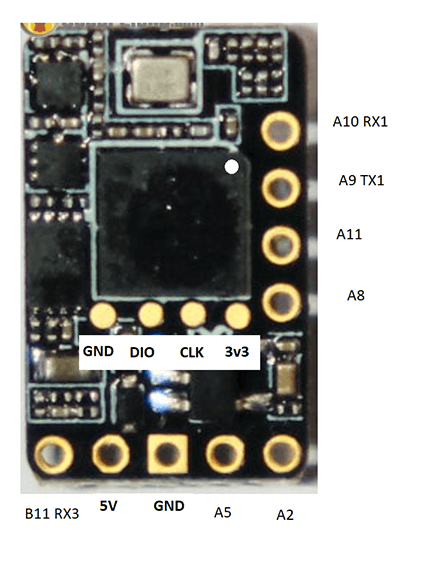
R9Mini/R9MM 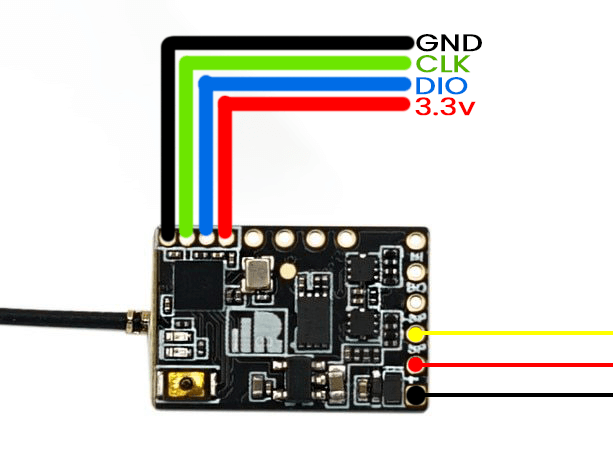
R9MX 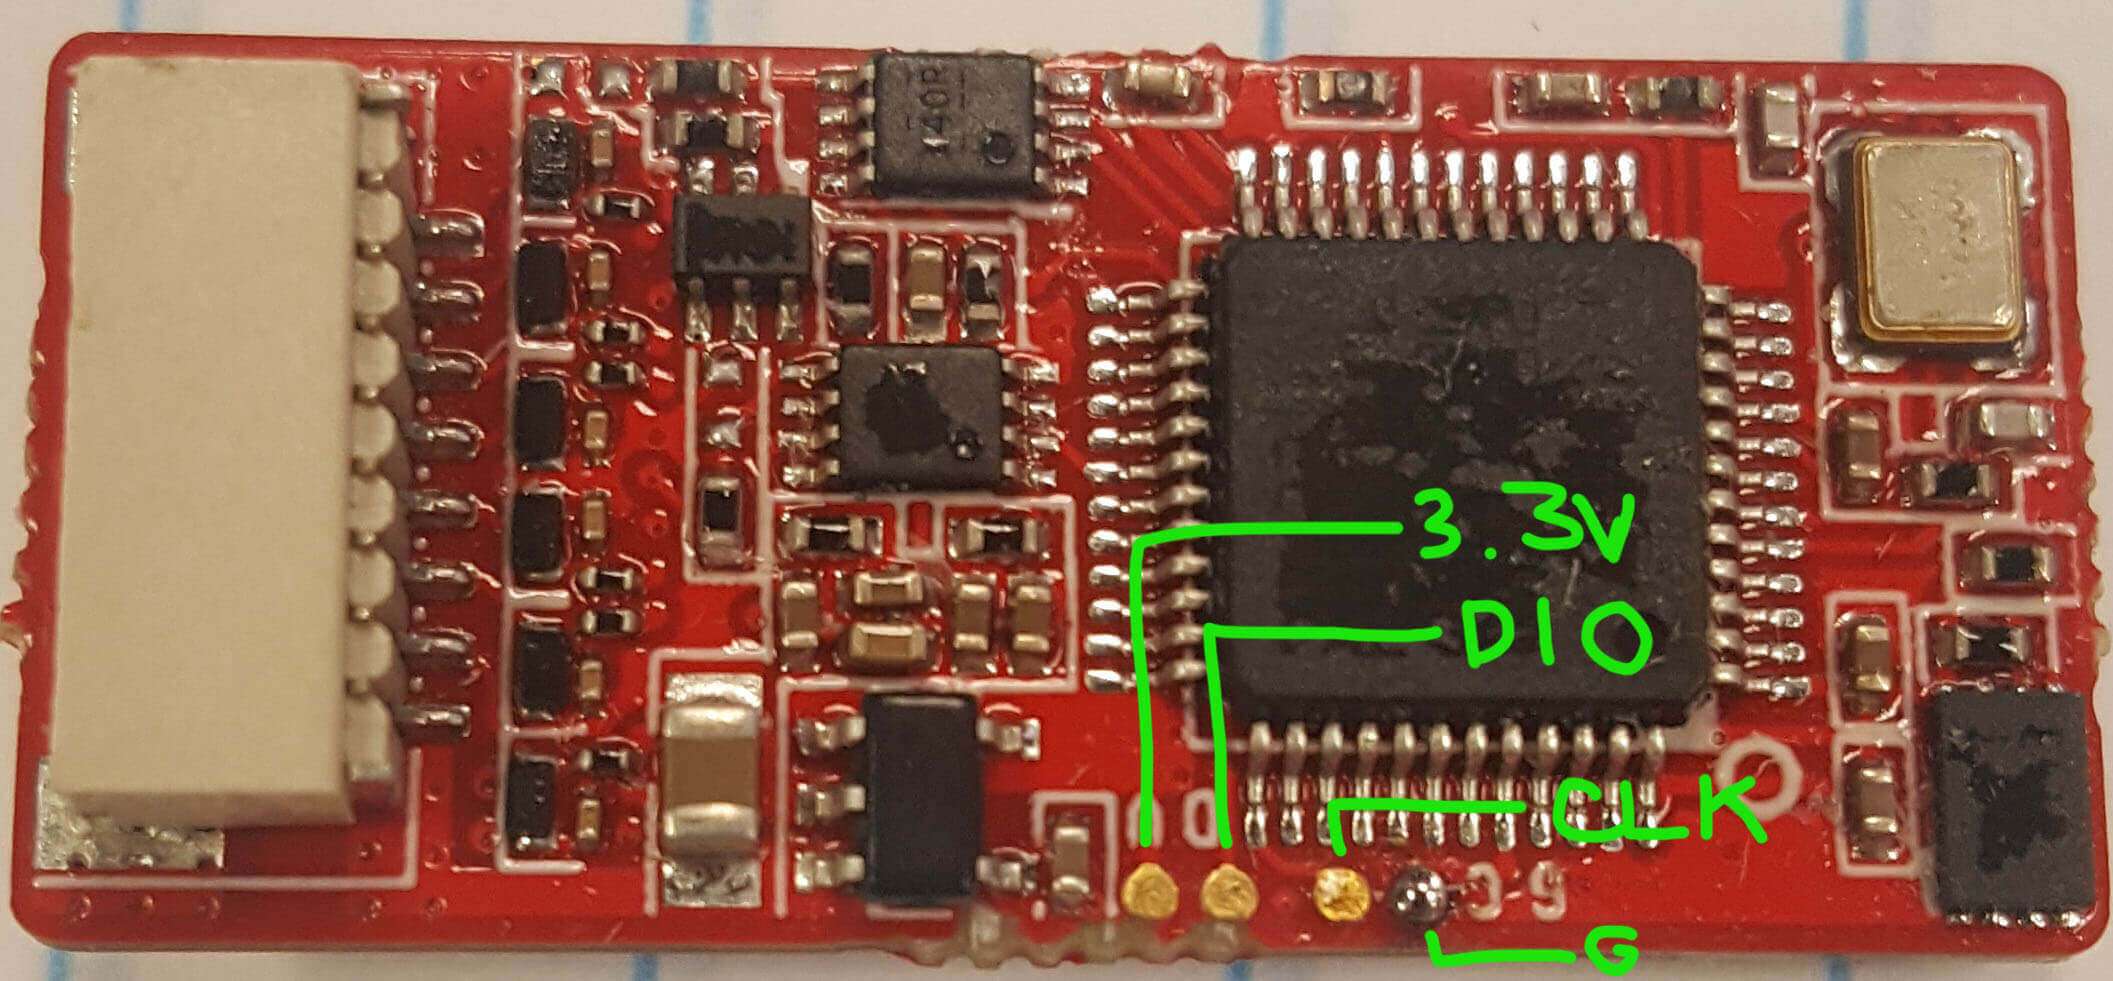
R9Slim/R9Slim+ -
Launch the ExpressLRS Configurator on your Computer.
- Make sure
Official Releasesis active from the horizontal tab. - Ensure you select the Released version you want to flash into your Receiver.
- Make sure
-
Select the Device Category and Device target matching your hardware.
-
Device Category:
FrSky 900 MHz
-
Device:
FrSky R9MM/Mini 900MHz RXFrSky R9MX 900MHz RXFrSky R9 Slim 900MHz RX(If already flashed via STLink)FrSky R9 Slim Plus 900MHz RXFrSky R9 Slim Plus OTA 900MHz RX
-
-
Set the Flashing Method to
STLink -
Set the firmware options for your device.
- Regulatory Domain (Mandatory. Choose the domain appropriate for the location or country you're flying).
- Binding Phrase (Optional, but Highly Recommended. Note this phrase as it should be the same on your other devices, or they will not bind or sync).
-
Click the Flash button.
-
Wait for the process to finish. A Green Success bar will show up in the ExpressLRS Configurator.
-
The LED on the Receiver should return to Slow Blinking LED pattern after a few seconds.
-
Rewire your receiver to your Flight Controller.